Installing a Verba Recording Server
If you haven't already done so, please make sure all the prerequisites are installed for your Recording Server. Refer to http://kb.verba.com/display/docs/Installing+the+required+prerequisites
The Verba Recording Server role is responsible for the various recording tasks. The media files will only be stored temporarily on these servers, they will upload the media files to the configured media repository and apply updates to the Verba database (usually located on the Media Repository server or a separate SQL server).
Before starting to install a Recording Server, please make sure that you already have a Media Repository installed and that the PC you are installing the Recording Server on can reach the server containing the database.
Step 1 - The install kit starts installing Verba components. Simply press the Next button to start the installation.
Step 2 - Read the Verba license agreement carefully before you click Next button.
Step 3 - Select the Recording Server role from the list. Click Next.
Step 4 - Select the destination folder for Verba system and the desired location of the media files. You can change the default setting by clicking on the Change button and selecting another folder. Please note that this is just a temporary folder for the media files. After the recording completed the files will be uploaded to the right location. If you have finished the destination folder configuration, press the Next button.
Drive root cannot be provided for the media folder (ex: D:\). A folder has to be created.
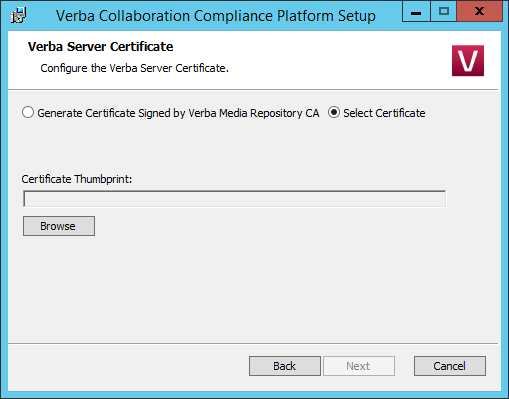
Step 5a - If a Verba CA is being used, then select the "Generate Certificate Signed by Verba Media Repository CA" option, then click on the Generate button. In the Generate the Verba Server Certificate window provide the address of the first Media Repository server, the Verba administrator username and password, then click Generate. Finally, click on the Next button. (If this option is being used, Step 5b can be skipped.)
Step 5b - If there is an existing certificate from a previous Verba installation (in case of reinstall or upgrade), or a pre-generated certificate for the server exists (requested from a local or a 3rd party CA), then select the "Select Certificate" option, then click on the Browse button.
Certificates generated by the Verba CA
Based on the Friendly Name of the certificates the server and the CA certificate can be identified easily. On the screenshot, the first one is the server certificate and the second one is the CA certificate.

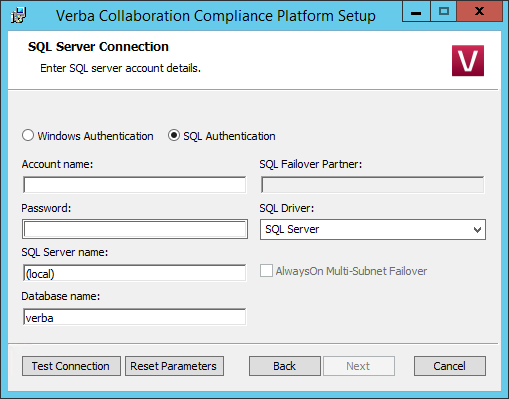
Step 6 - The Verba installer is asking for the MS SQL Server credentials. The server name can be entered either as an IP address or an FQDN. Both SQL server based and windows authentication is supported. In case of windows authentication, the Account name has to be provided in UPN or domain\username format. All Verba servers and components have to use the same database! If SQL Mirroring is being used or AlwaysOn with Multi-Subnet failover, then a different SQL Driver has to be selected. In this case, the driver has to be installed on the server. Click 'Test Connection' to verify your input. If the tests were successful, click Next.
Database connection troubleshooting tips
- Try to ping the database server. Try to connect to the 1433 port on the database server. (telnet or Test-NetConnection)
- Check if the user has the necessary roles assigned, refer to SQL Server requirements for more information
- If Windows Authentication used then check if the user has the Local Administrator group membership and the 'Logon as a service right'.
- Check if the correct instance name is provided at the SQL Server name. If there are multiple instances, then the SQL Server Browser service must run on the SQL server side.
- If you installed SQL Server Express Edition, then check if the TCP/IP protocol is enabled under the SQL Server Network Configuration in the SQL Server Configuration Manager.
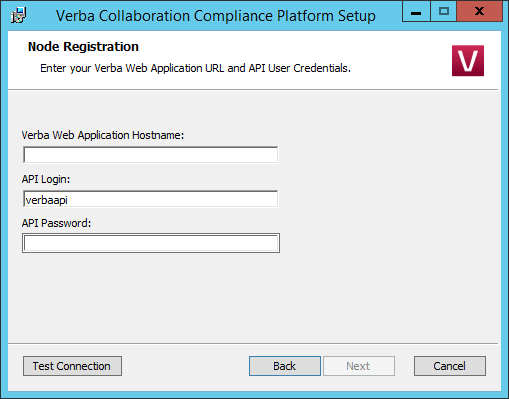
Step 7 - Provide the address of the Verba Media Repository server, and the API user password. The API user created at Step 14 during the installation of the Media Repository server.
Step 8 - Select the primary IP address of the server from the list, then click Next.

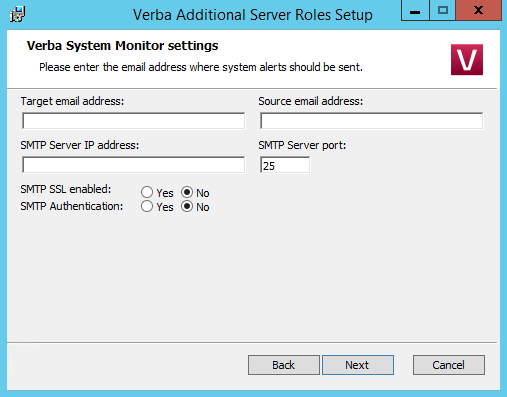
Step 9 - Please provide a target email address, a source email address and an SMTP server address for system alerts. If authentication required then please enter the credentials. The target email address will receive alerts concerning the various services of the recording system. This step can be skipped and the details can be provided or modified after the installation. When you are done, click Next.
Step 10 - Click Next again to start installing the services. When it's done, click Finish to exit the installer.