Custom User Fields
This feature allows configuring up to 10 custom user fields. Custom user fields are available for conversation search. Active Directory synchronization is able to automatically populate these fields. Custom user fields are also available at various part of the system including data retention, exporting, etc.
Configuring Custom User Fields
Step 1 - To access the custom user fields interface, navigate to Administration -> Users.
Step 2 - Select manage Custom Fields on the top right edge of the screen.
Step 3 - Check the Enabled checkbox and enter the field name.
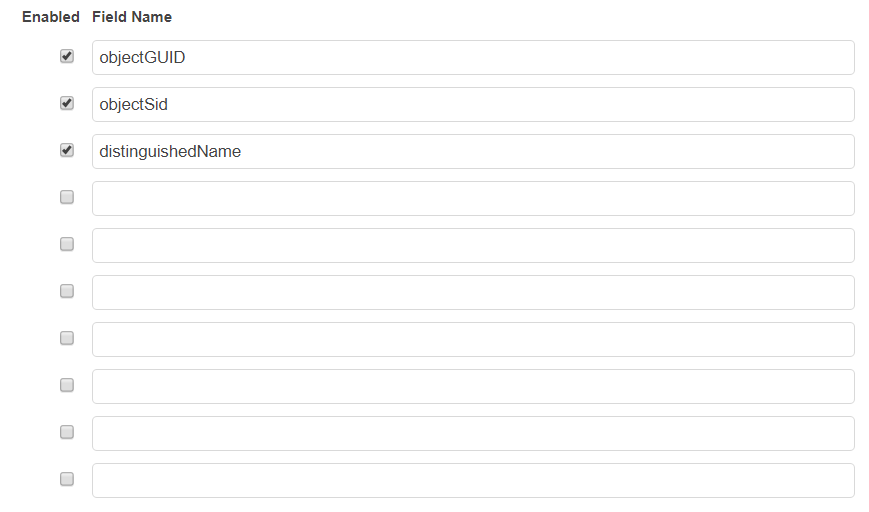
Step 4 - You can manually set/edit these values or automatically populate them using AD sync.
Manually set/edit the Custom User Fields
Step 1 - To manually set/edit the custom user fields navigate to Administration / Users and select the user you would like to edit.
Step 2 - The previously created custom user fields are stored under Customizations. The values can be set and modified here.
Automatic population of the Custom User Fields
Step 1 - To automatically populate the custom user fields using AD sync navigate to Management Tools / Active Directory Synchronization.
Step 2 - Select Add New Active Directory Profile on the top right edge of the screen. See Active Directory synchronization page for more information.
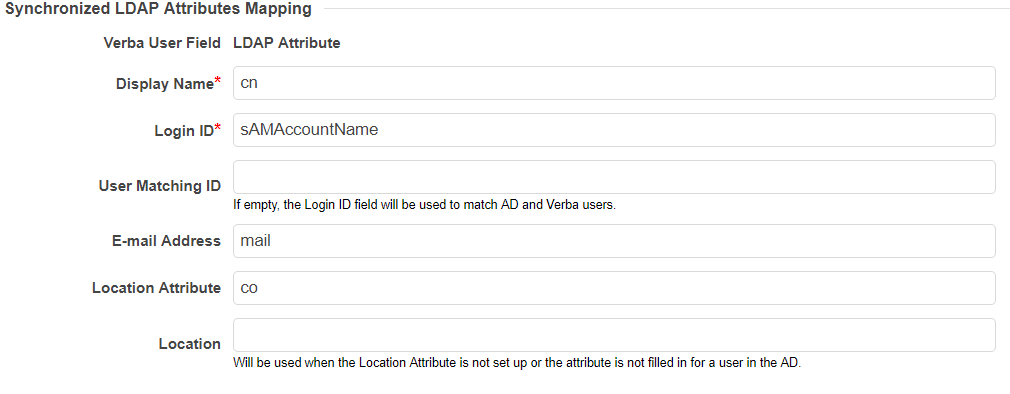
Step 3 - The previously created custom user fields are stored under Synchronized LDAP Attributes Mapping. The (case sensitive) values can be set and modified here. The entered value must match an AD user property attribute otherwise nothing will be imported.
Step 4 - After filling the form, press the Test Connection button to see what user attributes are going to be synchronized.
Step 5 - Once you are done, press the Save button to store the new profile under the Administration -> Active Directory Synchronization menu item. Select Run Each Active Directory Profile Now to run the synchronization.